

Prolog
The idea to install Blinds on the South-East (mainly South) side of our balcony emerged about a half year ago. Last autumn, we started to put our son to sleep on the balcony. The morning sun was very annoying because it was shining directly through the South-East window of our balcony.
To create some shade, we ordered TRETUR roller blinds from IKEA. The blinds arrived with a couple of weeks of delay as IKEA was relocating its warehouse. Then we went for a vacation to Ukraine, and afterward, it was Winter, and we didn't go out on our balcony.
Fast-forward to now, and we are returning home from a skiing vacation. The corona virus is all around: ski resorts are closing, shops are closing, I'm working from home. And the best thing: it's warm, it's sunny, and I can work from our balcony. On Monday morning, I proudly start working from the balcony. It's still chilly, so I'm wearing a light jacket, but in an hour it becomes warm enough to wear just a t-shirt. And then closer to 10 AM, the sun creeps out from behind the wall, and I can't see anything on my screen… Now is the prime time to install the blinds.

The Setup
On the South-East side of the balcony, there are three stationary windows (they don't open). It would make sense to install the curtains in front of them.


The TRETUR blinds should be mounted with screws either to a wall or to a ceiling. They have metal plates that you mount first, and then attach the blind box to the metal plates.


There were two main options of attaching the blinds: 1) drill the balcony above us; 2) drill the metal frame of the windows. As we are renting this apartment, I don't want to drill anything that I can't cover up quickly (especially metal). So I decided to hook the blinds onto the metal frames of the windows. And yes, I designed and 3D printed the hooks.
The Solution
I started with a simple prototype that was going around the window frame and gripping it from the underside.

Besides some dimensional inconsistencies, it was clear that this design won't work at all on the leftmost window. As you can see on the left side of the photo, there is one window with a frame of a different shape (it is possible to open it for cleaning purposes).
I decided to abandon the gripping part on the inside arm and make it shorter to fit on every section on the window frame. This way, I had to deal with only one design while not sacrificing much. This part of the model should mostly experience the downwards force that comes from the wight of the blind. Thus there is not much sense in bracing the inner arm from an upward force.
The second challenge was to attach a metal mounting plate of the blinds to my hook. The holes on the mounting plates were 3.7mm in diameter, so I had to use M3 screws. I decided to use wide washers with 13mm diameter to distribute the force over a larger area (mainly for the printed model). I also decided to use nyloc nuts, so if the screws loosen, they will not undo themselves easily. Finally, as the plastic hook rests against the window frame, I had to make sure that the screw heads recess completely into the plastic model.


You can notice on the pictures above: there are no visible washers on the side of the printed object. This is because the washers are embedded. I could make large holes on the screw cap side, where a washer would fit together with a screw head. However, I decided to remove as little material from the hook as possible to maintain its durability. That's why I created narrow slots, where one can insert the washers.


I even took one step further and sealed the slots from the top. I've inserted the washers during the printing process, and then the print was finished on top of them.
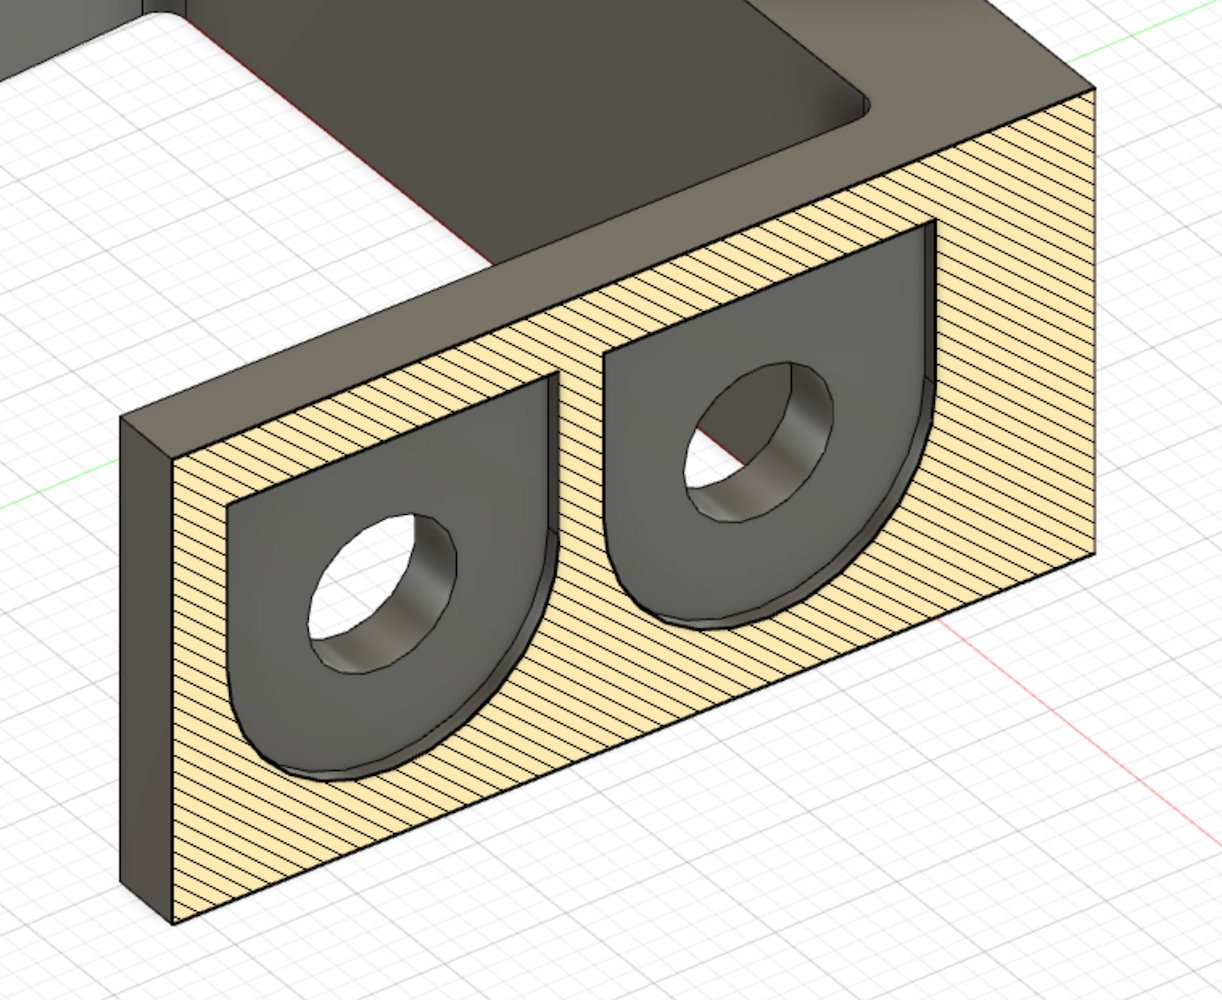

I printed the final version from a white (natural) Prusament ASA. The plastic hooks will be exposed to the sun plenty the time, and it's useful if they have a good heat and UV resistance. I also printed them with 4 perimeters to increase their strength.

Wrap up
The blinds attached to the frame snugly and securely. I tested a bit the hooks by leaning onto the metal plates, and there should be no issue with the weight of the curtains.

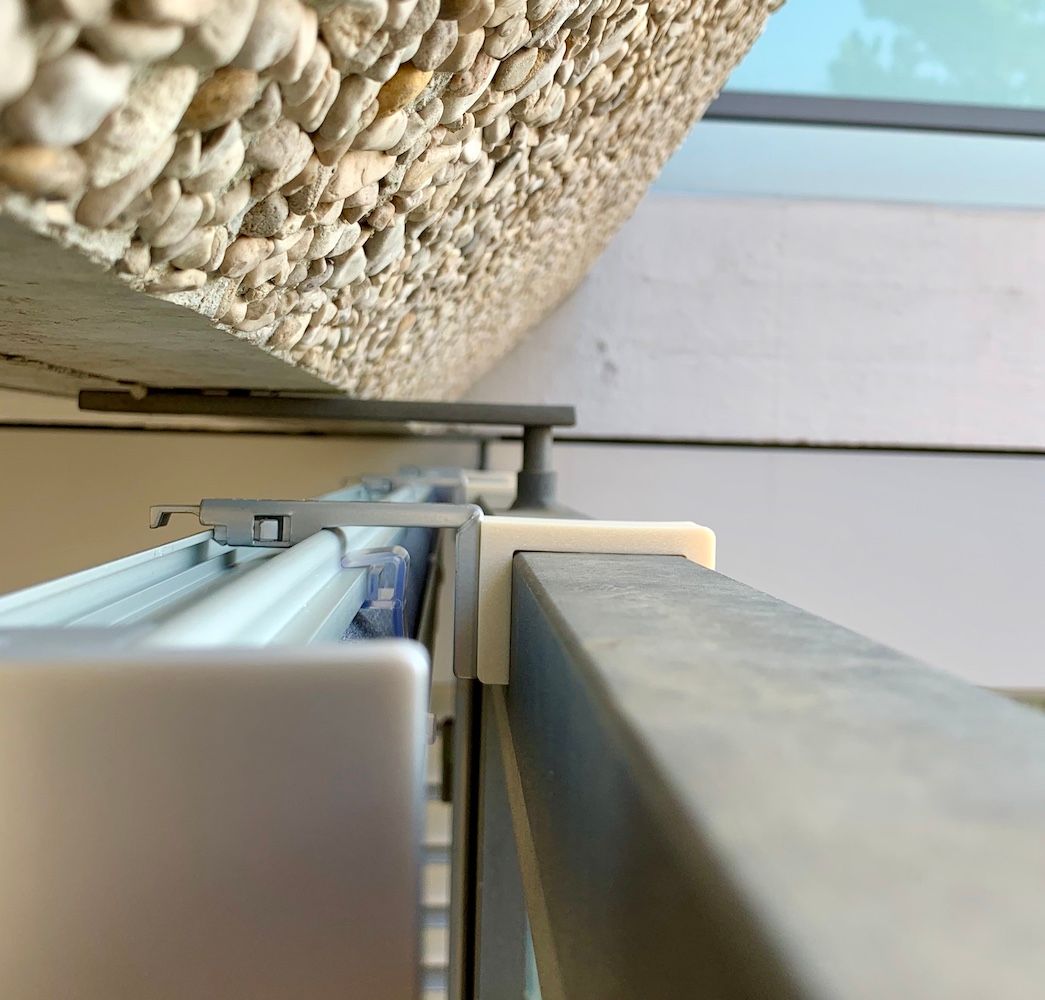
I noticed, though, that the blinds are in a relatively open place. Rain can reach them easily, and they are completely open from behind. Now I'm working on a rain shield. It attaches into the mounting grooves on top of a blind and extends over the window frame. But this is a work in progress.

These blinds don't have some rope or stick to lower them — they have a small loop. IKEA sells a dedicated stick to reach the loop, but I just designed and printed the longest model I could fit on my print bed.


And this is it. I have blinds on my balcony. I can work there comfortably. Next week it will be cold and rainy, but what can you do? C'est la vie.
