
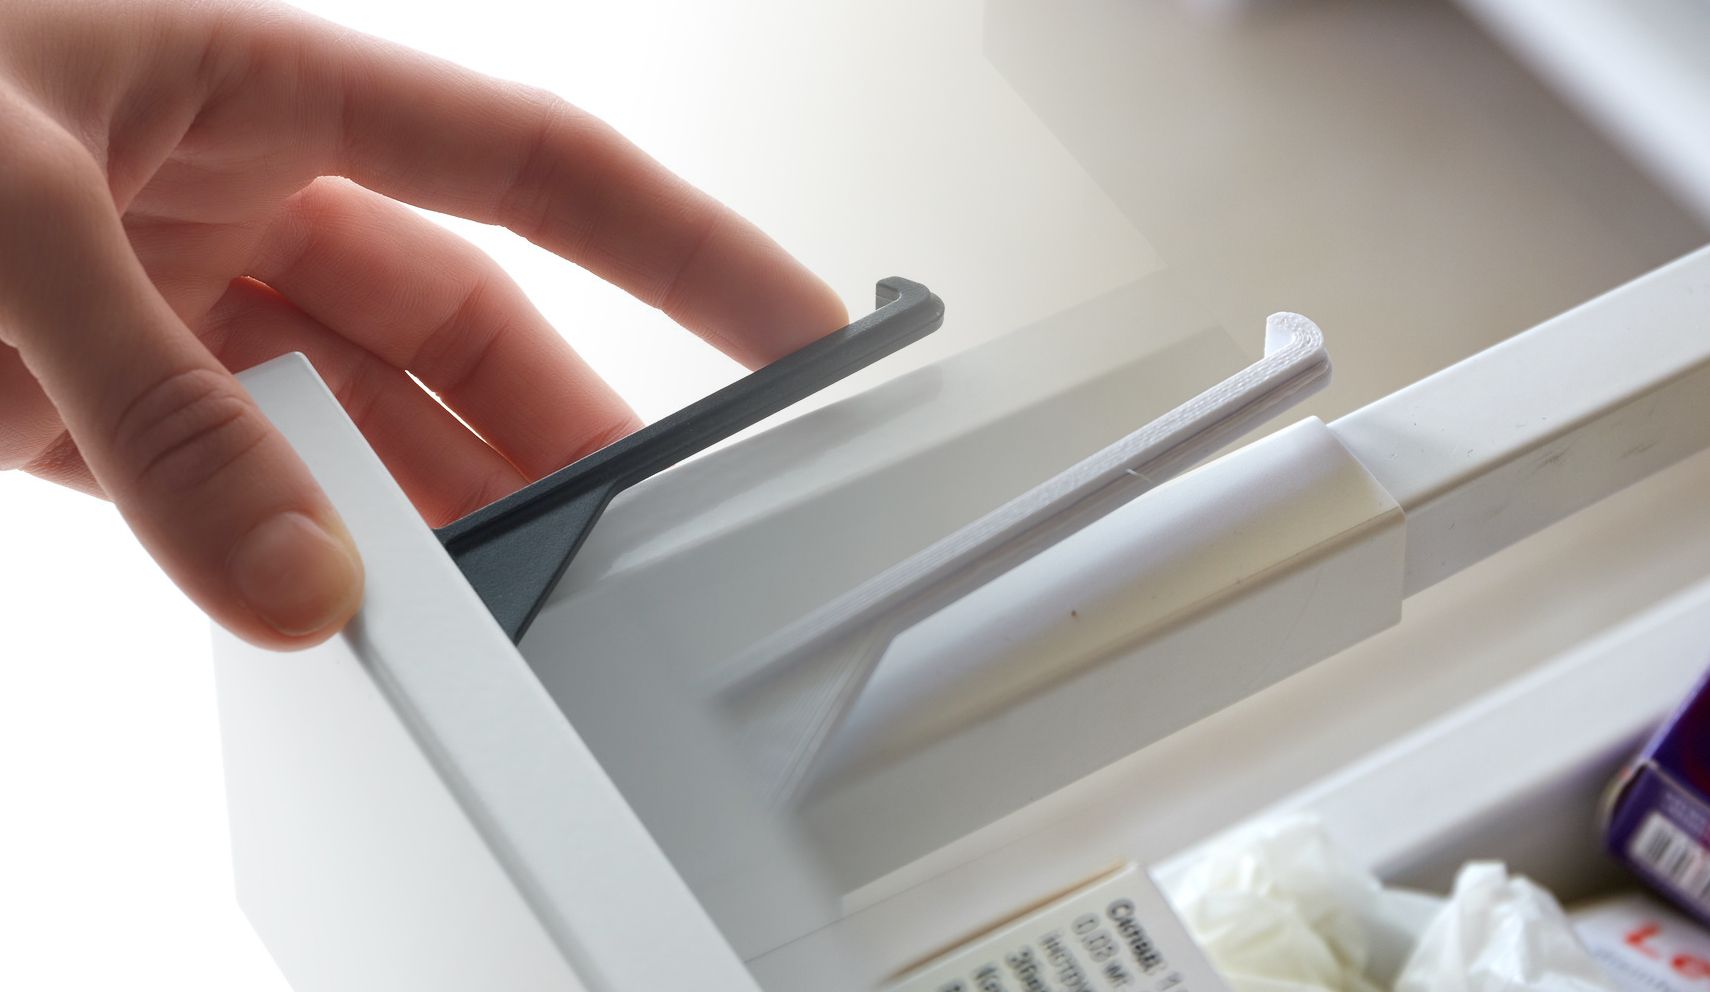
After one of the significant rearrangements at our home, medications ended up in an easily accessible drawer. Needless to say, we wanted to limit access to the medications for children. As the drawer was from IKEA, we also found a simplistic catch manufactured by the same company. The product's full name is PATRULL Drawer/cabinet catch, and I especially like it because the whole locking construct is inside of the drawer. When we wanted to buy this item, it was out of stock at the closest IKEA store as well as the official IKEA online shop. Nowadays, this item is not available in Switzerland at all. So what would you do? I decided to print it.
The Setup
First of all, I had to model the drawer catch. Of course, I could design a unique model, but I decided to re-engineer the design of IKEA. This project is not the first clone that I created. Still, for all the previous projects, I had the original item at my disposition. Not being able to look a the item from every angle and measure every dimension poses a big challenge. Luckily for me, the drawer catch is a relatively simple model, and IKEA has a very lovely policy about their manuals. Each product has one or more assembly manuals that follow the same design, and all of them are available in a PDF format for free from the official IKEA website. On the first page, each manual has a picture of the product. I used the first picture from the drawer catch manual as my primary guide.

I needed to see the image-guide all the time and be able to compare my 3D model with it. I used the LayerX app for Mac do display the translucent image from the IKEA manual over the OpenScad app. I believe there are many similar apps for other operating systems.

IKEA manuals use orthogonal projections to depict items (i.e., the projections are not distorted because of perspective). This is helpful as you can also use the orthogonal projection view in OpenScad.
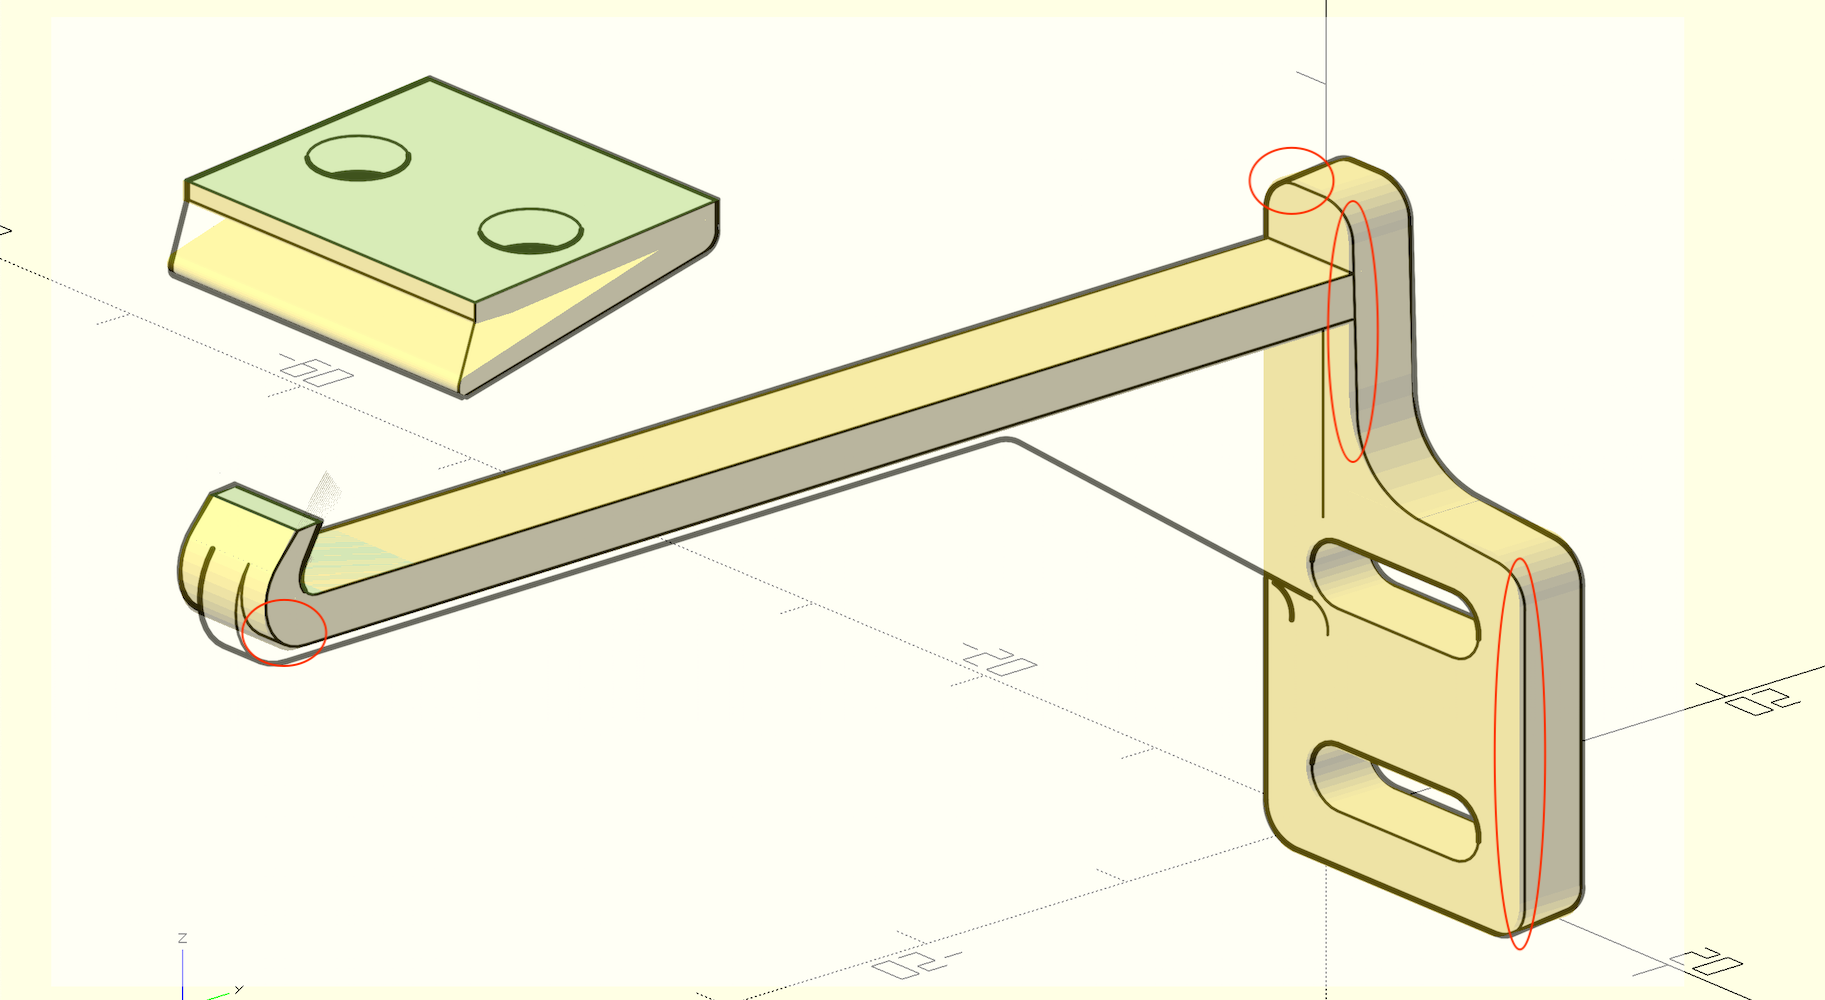
The next step was to decide how basic properties relate to each other in the actual model because a projection always discards some facts. I assumed that the attachment plate of the hook-part is a cuboid with a cutaway. And that the hook rod is perpendicular to the attachment plate. In other words, here are some basic properties that the following picture satisfies:
- a* lines are parallel
- a¹, a², b1, b² are on the same plane
- a³, b³ intersect on a plane parallel to the plane of a¹, b¹
- b* are parallel
- b* are perpendicular to a*
- a¹ and c³ are on the same plane
- c* are parallel
- c* are perpendicular to the plane of a¹, a², b¹, b²

Modeling In OpenScad
A useful trick in OpenScad is to hardcode the camera position. This way, each time you when you preview (or render) the model, the camera is placed in the same location. There are 3 special variables: $vpr (viewport rotation), $vpt (viewport translation), $vpd (viewport distance).
The rotation vector is the most important one as it defines how the projection is constructed. For me, it was equal to [65,0,45]. These are nice numbers because IKEA constructs the projections for their manuals under clean and well-defined angles. The last coordinate of 45º defines rotation around the (vertical) Z-axis. As a result, we end up looking from an equal distance between the X and Y axes, and this explains why b* and c* lines have mirrored properties in the above diagram. The first value of 65º defines the angle from the Z-axis. In this case, 0º means that we look straight down, while 90º means that we look from the ground level. The middle 0º defines the rotation around the viewing axis (this is what happens when you tilt your head to the side). You can't change it by moving the camera with your mouse, and you won't need it for the most common use-cases.
Viewport translation is represented by three coordinates that define the point at which the camera is looking. This value is useful for centering your models in the viewport. Finally, the viewport distance variable is just a single scalar value that defines the zoom level. There is no need to get all the values by trial and error. You can set up the view with your mouse and copy the viewport values from the bottom bar of the OpenScad window.

One important thing during 3D modeling is to print your prototypes often and test if they work. I had some misalignments, but it's just a rough prototype, so I printed it and discovered that what I did doesn't make any sense…
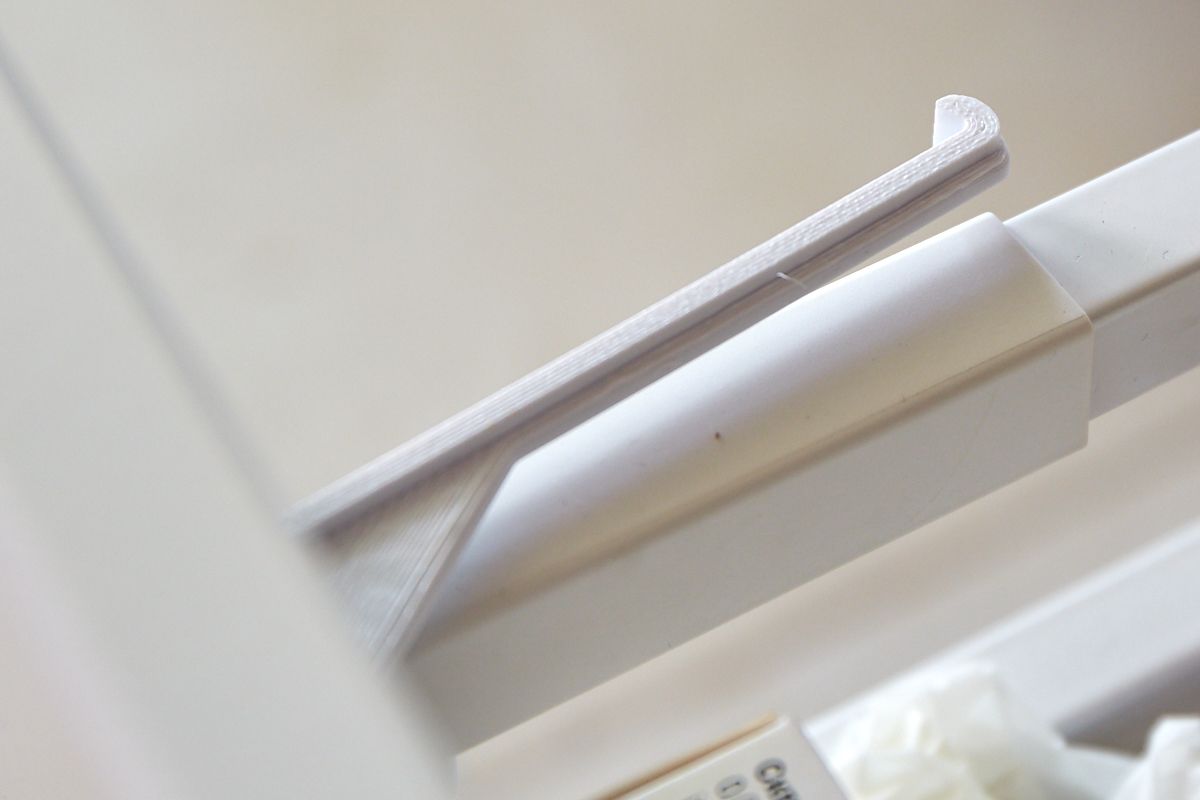
The hook was not going out of the drawer far enough to catch anything. When I investigated available photos and diagrams more carefully, it became apparent that the hook's rod is not perpendicular to the mounting plate. Instead, it's inclined in the direction of the hook's "tooth."

So I went back to the drawing board. I had fewer constraints now as I didn't know the inclination angle of the hook. Thus I decided to recreate the mounting plate with more precision and then determine the angle from the diagram. My second try was much better, and here you can see the final version.

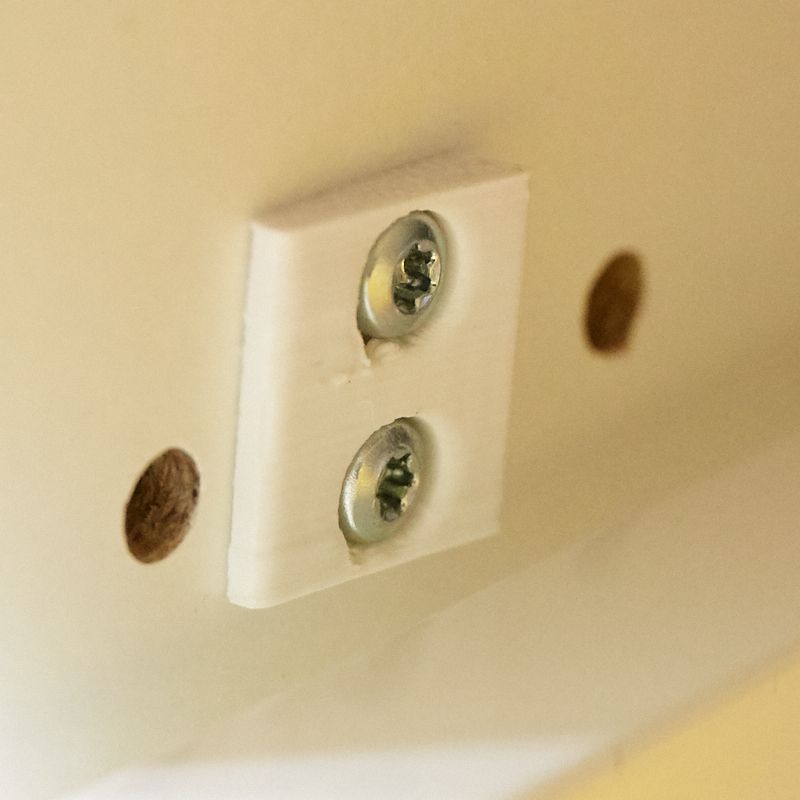
Some parts are still not perfect. For specific curves, it was too much of an effort to make them the same as on the drawing. I also made some holes smaller to fit my screws better, but ultimately it worked.
When cloning objects based on their pictures, there is one final step to do — scaling. We can make a dimensionally-accurate model, but in the end, we need to make sure that the scale is comparable to the original. I did this partially by correlating sizes available in the manual and partially by printing the objects, seeing if they work in the physical world, and adjusting the scale.

I printed the designed objects in PETG because of its flexibility and impact resistance. Also, I printed it in white, and this is awesome. I like the white color that matches the drawers, but the original items were only produced in black.


The Morale
First of all, I have a catch that stops children from accessing the drawer with medications. Secondly, I have a model that I can modify if it does not work well in a particular situation. For example, after some time, a child may learn how to open the drawer. Then, to complicate the access, I can mirror the model and attach a second catch on the other side (this would not be possible with the original IKEA item).
I shared this story with you, and I hope that now you have more ideas on how to use OpenScad and how to redesign existing objects without having them at hand. I also hope that this post was entertaining for you.
I have no clue how does this all fits into the legal field. I won't share any models, as I believe that this can violate the intellectual rights of IKEA. But I don't know if I'm allowed to do such clones for personal use, and if I'm allowed the share such information with you. If I listen to my moral sense, I think that it's okay. In the end, I made an item of inferior quality, and even if I wanted, I could not buy it anyway.
